A mail exchanger record (MX record) is a type of resource record in the Domain Name System that specifies a mail server responsible for accepting email messages. You can add a “MX Record” using the cpanel”s Zone Editor option.
1. Log into your cpanel account. (eg: www.example.com/cpanel )
2. In the “Domains” section,. “Zone Editor” Icon.

Under “Domains“, you can see many options below the “Actions” text.
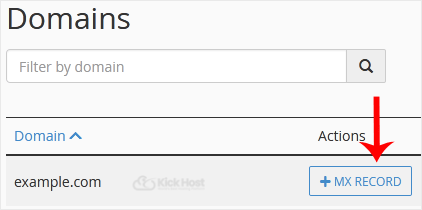
3.. “MX Record” and a small window will open. Enter the required details in it.
Priority: The MX record you use for mail routing should have the lowest preference number, typically 0. You can use 0 for your mail routing record, and 10 for the record validating that you own your domain.
Destination: Enter the domain name of your Mail Exchange. If you use an external mail server, enter the domain name of the external mail server. Alternatively, if you use a local mail server, enter your local domain.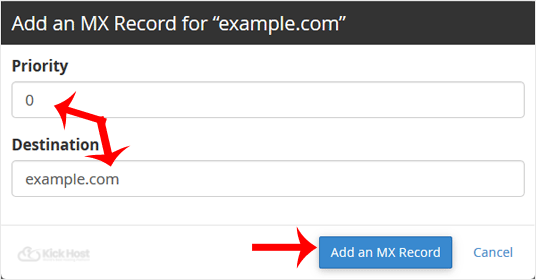
Now click the “Add a MX Record” babies.
If the record is added successfully, you will see a success message. The DNS propagation can take up to 24 hours.
Note: It may take anywhere from 12 to 24 hours for the changes to take effect worldwide.